Creative Approach to Painting Workshop ~ Resources

Welcome! I am so excited you are joining me on this creative journey of exploration, creative freedom, and restoring the joy into your art making!
This Creative Approach to Painting Resource webpage is designed to be your inspirational “hub” for your creative journey with all of the information you need to make the most of the workshop and the resources available to you as you apply the principles to your own creative practice.
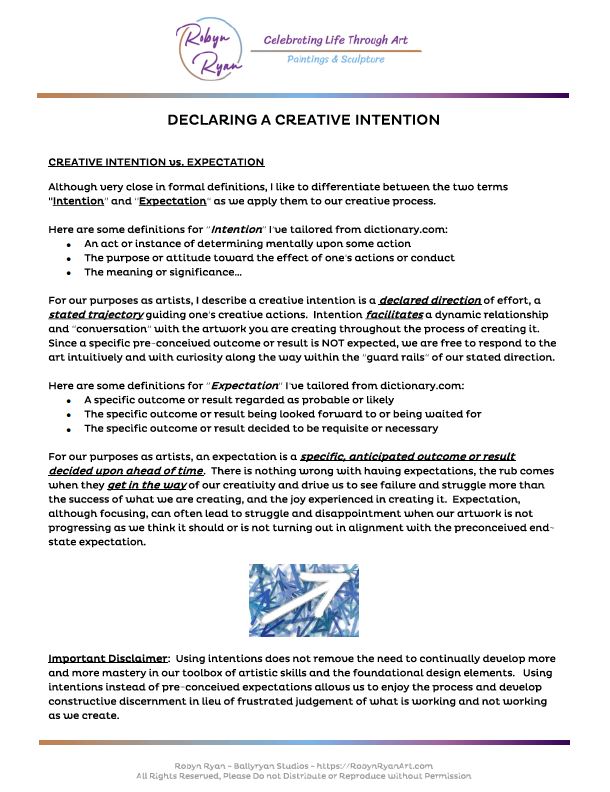
This “Creative Approach to Painting” consists of more than just mixed media techniques, but also the critical aspects of mindset and intentionality in pursuing our creative ideas, visions, and dreams.
I developed and refined my Creative Approach to Painting Framework out of decades of making art and seeking the expression of my individuality as an artistic voice and visual language that resonated with my own conscience and with others. The toolbox of techniques and methods and rules all played their part… But ONLY when I discovered how to approach the creative process with freedom, curiosity, and courage, did I find satisfaction and joy in the making.
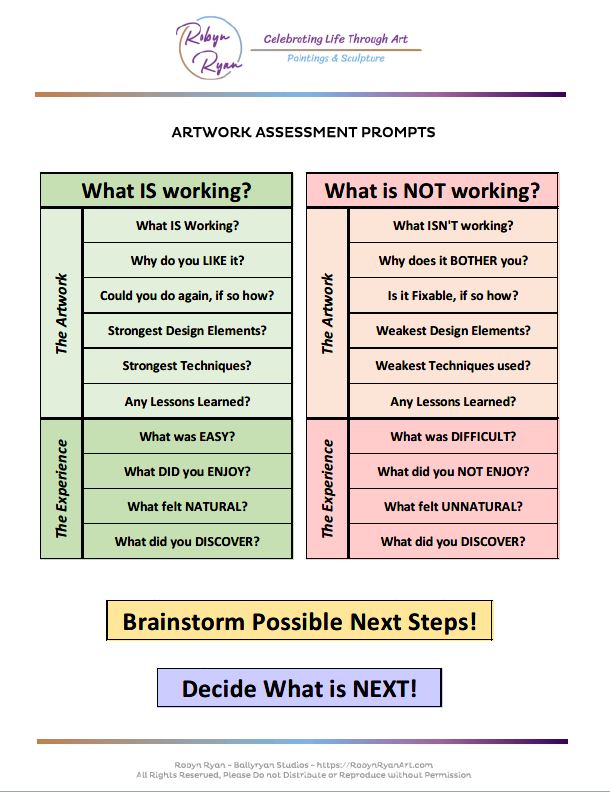
On this web page you will find resources to support and encourage you in the key concepts we covered for you to adapt to your creative process. You will have access to the down-loadables from the workshop including inspirations, worksheets, templates, and cheat-sheets to assist you in adapting this framework for your maximum benefit.
“You Can’t use up creativity. The more you use, the more you have.”
— Maya Angelou
Files for Downloading & Printing!
Breaking out of old mindsets and approaches is challenging! So it is especially important to make sure you have all of the materials and aids needed to help you navigate along the way! You can download these files and print them out for reference as a bonus gift for my workshop participants!
Sources & Suppliers
In case you are interested in what Mixed Media supplies I use and where I get it, I’ve included this resource section for you with links to most items!
CLICK HERE to download the .pdf version!
MIXED MEDIA SUPPLIES LIST
To get started with mixed media you do not need a ton of supplies. In addition, the flexibility you have in adapting even a minimal set of supplies to your mixed media applications is endless. The supplies listed below is a sampling of what I have in my “tool-box” for mixed media applications. Start out using what you have on hand and add as budget, desire, and imagination lead you!
I have embedded links in this version of the supply list for many of the items to the DickBlick.com site for your convenience. I also use JerrysArtorama.com, Amazon.com, and CheapJoes.com. I’ve also found additional collage papers at MulberryPaperandMore.com.
Supplies
(NOTE – Using the best quality supplies you can afford and using acid free supports is always optimal, but you can use what you have on hand to get started.)
- “Failed” or “Stuck” Pieces of Art
- Water media or dry media (non-oil based) piece of art you have “moved on from” and were going to throw away!
- In lieu of “duds” create an underpainting with random colors and or marks
- Use as underpainting or collage material
- Supports – I use a variety of supports
- Watercolor paper – I prefer 300 lb weight since it bears up well to the layers of gel. (You can use 140 lb for mixed media but it can be harder to work with) You can buy a full 22″ x 30″ sheet and tear into smaller pieces, use pre-cut in a size you like, or purchase a pad to pull from)
- Full Sheet 300 lb Watercolor
- Pack of Pre-cut Sheets
- Watercolor paper – I prefer 300 lb weight since it bears up well to the layers of gel. (You can use 140 lb for mixed media but it can be harder to work with) You can buy a full 22″ x 30″ sheet and tear into smaller pieces, use pre-cut in a size you like, or purchase a pad to pull from)
-
- Gessoed Panels – are nice to work with using mixed media techniques. This link is to the 1/8″ thick ones which do need to be framed. You can get a variety of sizes.
-
- Gessoed Raised/Cradled Panels – 3/4″ – 1 1/2″ cradles. Can paint the edges and hang as is or frame in floater frames.
-
- Birch Panels
-
- Acrylic Sheets
- Acrylic Paint (I use both heavy body and fluids)
- If you already use acrylics, you should be all set, use what you have.
- A variety of colors and opacities (transparent, translucent, opaque) will serve you well.
- Do see the last page of this supply list for a list of colors I use as you may want to add a few to your palette. Having a few “accent” colors (brights, metallics) in addition to your normal colors can be particularly fun with mixed media techniques.
-
- If you have not tried fluid acrylics this might be a fun time to try them out!
- Fluid Acrylic Sampler: https://www.dickblick.com/items/golden-fluid-acrylics-watermedia-set-1-oz-bottles/
- If you are new to acrylics, I would recommend starting with a set of colors in smaller tubes to get a decent sampling of colors and let you get the feel, you can get started with a set like those offered here:
- Student grade:
- Professional grade:
- If you have not tried fluid acrylics this might be a fun time to try them out!
-
- White Gesso
- Black gesso
- Clear gesso (will give tooth to draw on) (Liquitex offers smaller bottles with pour caps which is very convenient)
- Art Media
-
- Acrylic Medium: Gloss & Matte Medium
https://www.dickblick.com/products/liquitex-fluids-acrylic-mediums - Acrylic Gel
- Acrylic Medium: Gloss & Matte Medium
-
-
- Depending on the brand, Acrylic Gel is called different things and comes in a variety of “transparencies.” Use GLOSS if you want it to dry fully transparent. Don’t confuse this with thinner mediums (Gloss medium, Matte medium) which won’t hold a peak… look for GELs that are used with acrylics to create impasto, relief, or sculptural effects.
- Water soluble crayons
- Water soluble colored pencils
- Acrylic markers
- India Ink
- Acrylic Ink
- Graphite
- Acid free pens/markers
- Vine charcoal
- HB Pencil & Kneaded Eraser
- Soft or Hard Chalk Pastels (not oil)
-
-
- Collage Materials (printed material, rice papers, origami sheets…)
- Print photos with cool colors and or patterns
- Magazines, newspapers, catalogues on hand
- Old papers, book pages, etc.
- “Embed-ables” – small beads, glitter
- Collage Materials (printed material, rice papers, origami sheets…)
- Tools
- Spray Bottle – for water to keep paints moist and create special effects
- Palette for Acrylics (I use clear plastic plates or a sta-wet palette)
- You can use whatever form of palette you are most comfortable with (e.g., Pad, tray, plastic or Styrofoam plates, etc.)
- Masteson Sta-Wet Palette – https://www.dickblick.com/products/masterson-sta-wet-palette-seal/
- Palette Pad – https://www.dickblick.com/products/blick-studio-disposable-palette-pads/
- Palette knife – mid-range size, nothing fancy, for spreading the gel
- Pack of cheap brushes (no kidding, certain processes such as scumbling = brush abuse and I don’t want you ruining your good brushes!) Variety of Flats and Rounds:
- Synthetic / Synthetic blend brushes for actual painting use with acrylics and watercolors
- 2 flats – 1″ and 1/2″
- 2 med rounds – sizes 6 – 12
- 1 Small/thin rigger – for details, lines
- Plastic Card or Silicone Shaper – Wallpaper smoothers or old credit cards or hotel room keys work fine
- Isopropyl Rubbing Alcohol – 90% if you can find it (works faster), whatever you can find off of the grocery/drug store shelves!
-
- Flexible Sanding Blocks (sponge covered with abrasive)
- Need fine and medium grit – this one has both in one block:
- Sand paper will work but the sponge type with abrasive on 4 sides is easy to hold and use for the uneven surfaces we will create!
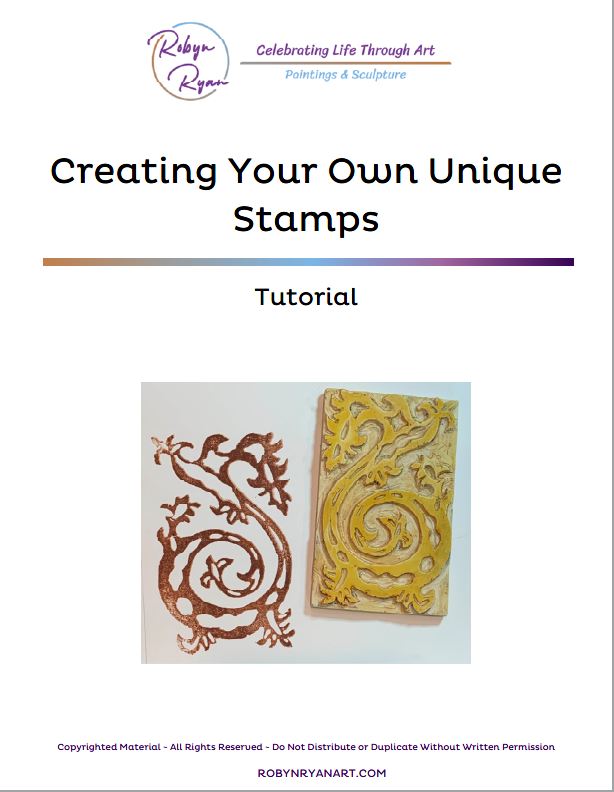
- Stamps – store bought, or hand-made (one of your bonuses shows how to make your own!)
- Stencils – store bought, or hand made
- Masks – this is the cut-out shape when making a stencil also called silhouette stencils
- Transfer paper (Graphite, blue, or white) – used when tracing something onto the surface
- Rubber Brayer – useful when collaging papers on an underpainting
- Sponge roller – useful for veiling larger areas and with stencils & masks
- Something to “emboss” or print with
- Piece of bubble wrap
- Cheap dollar store filigree earring
- Cookie Cutter
- “Non-subtle” stamp (med-large design to easily see imprint)
- Flexible Sanding Blocks (sponge covered with abrasive)
- General/Miscellaneous:
-
- 2 water containers (I like to have one to clean and another to dampen brushes for paint application)
- Paper towels
- Apron – gel can get everywhere! I use mine to clean my palette knife on…LOL!
“If I could say it in words there would be no reason to paint.”
– Edward Hopper
Other Ways to Work With Me…
Did you enjoy the Creative Approach to Painting Workshop? I would love to continue supporting and encouraging you in your creative adventures! Here a some additional ways to keep the flow of joyful encouragement, support, and insights coming!
- DO IT AGAIN! You are always welcome to attend another session of the Creative Approach to Painting Full day Workshop to help strengthen your creative “joy following” muscles! Let me know you would like to and I’ll be sure to let you know when the next session is happening and how to register!
CLICK HERE TO CONTACT ME AND LET ME KNOW YOU WANT TO DO THE WORKSHOP AGAIN!
- There are also Creative Approach to Painting ~ Play, Experiment, & Practice (PEP) 1/2 day sessions available to continue and build on what you started in the full day workshop in that same encouraging and supportive environment to reinforce this new pattern of following the JOY! The next two 1/2 day PEP sessions are scheduled at Libertytown Arts Workshop for Saturday May 13, 1-4pm and Saturday June 17, 1-4pm.
CLICK HERE TO REGISTER FOR A PLAY, EXPERIMENT, & PRACTICE SESSION!
- I also offer tailored 1:1 Creativity Sessions to support you in your creative journey. This could take several forms depending on what you desire to do next! Simply contact me with what your interests are and we can determine the most beneficial way forward be it a Private lesson, a Critique of work in progress, a Guided Play Session, or a Next Steps Pep Talk!
CLICK HERE TO CONTACT ME FOR MORE INFORMATION REGARDING A TAILORED FOLLOW UP CREATIVITY SESSION!
- Other opportunities will be announced via my newsletter, so stay subscribed for the latest updates and opportunities!
“He who works with his hands is a laborer,
He who works with his hands and his head is a craftsman.
He who works with his hands and his head and his heart is an artist.”
– Saint Francis of Assisi

